This tutorial is kindly provided by the plugin developer. You can access the full plugin's documentation on this URL: https://theeventscalendar.com/product/wordpress-event-tickets/
Event Tickets is a free WordPress RSVP and event management plugin available on the WordPress.org plugin repository. With Event Tickets, you get professional-level quality and features backed by a team you can trust.
Event Tickets provides a simple way for visitors to RSVP to your events. As a standalone plugin, it enables you to add RSVP functionality to posts or pages. When paired with The Events Calendar, you can add that same RSVP functionality directly to your event listings, including an RSVP Now button on list-style pages. This call to action makes it quick and easy for attendees to RSVP to your event.
Event managers are able to access RSVP information from the admin, allowing them to check in registered attendees when your event begins. Events Tickets allows you to own the entire event management process within your WordPress site.
Since the latest update, the Event Tickets plugin supports PayPal so users can easily sell simple tickets to their events with the free plugin. Event Tickets Plus (premium) still includes the same E-commerce platform compatibility for more advanced ticket sales. (you can find a more detailed description of the changes here: https://theeventscalendar.com/complete-free-ticket-sales-solution/)

Step 1: Installing the Event Tickets Plugin

Step 2: Using RSVPs with the Event Tickets Plugin
Instead of buying a ticket, entering credit card or PayPal information, or going through any other part of the checkout process, with the RSVP “ticket” option users just:
- Select a quantity for how many spots to RSVP.
- Enter their name and email address to confirm that they will be attending the event.
- Immediately receive a simple tickets confirming their reservation at the email address they entered.

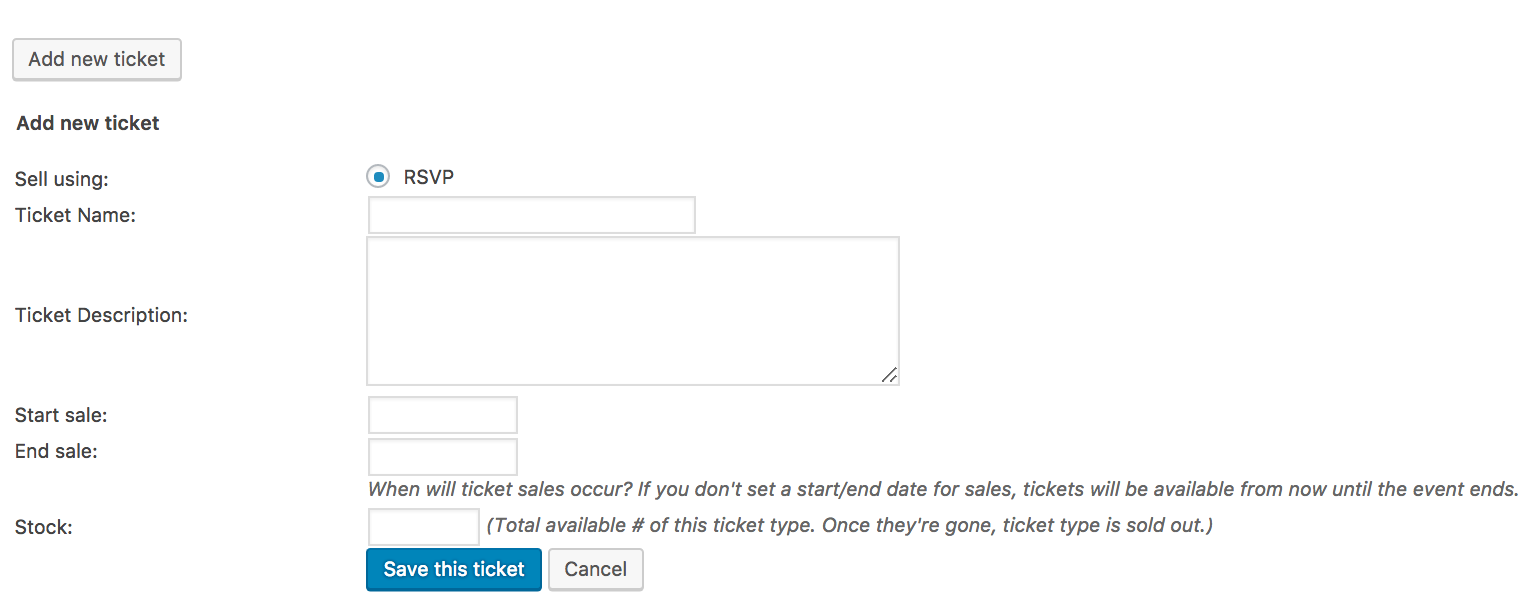
Here’s a screenshot exemplifying this sort of configuration, with multiple RSVP tickets. This screenshot also demonstrates the fields for RSVPs:

Ticket name: lets you set a unique name for the ticket type – which might be something like Standard, Adult, etc.
Ticket description: is optional, but it’s a good space to add any information attendees might be interested in, such as bring waterproof jackets or not recommended for children.
Start sale: dictates when the RSVP becomes available. If you’re using RSVPs on a post or page, this field is required. If you are making RSVPs on an event, you don’t need to set this field- by default sales will start when you publish the event or ticket.
End sale: does the reverse – you can set this to a date after which users will not be able to RSVP. As with the start sale field, setting this is optional for events and the default is to stop sales when the event itself starts.
Stock: is the number of tickets that are available: if you leave this blank it is assumed that there is no limit. If you have a limited number of spots for your event, you’ll want to make sure to set this accordingly.
SKU: lets you set a unique code to help identify the tickets. This is another optional field and is of most use to merchants with an existing stock-keeping unit system.
